Open topic with navigation
Exporting Reports
- The Export Report feature allows you to save reports run from the system in other file formats, ie. PDF, Excel, Rich Text, etc.
- This function is accessible from the:
- Reporting parameter screens by clicking the Application tool-bar push button: Export.
- From within the Report viewer window by clicking the Report viewer tool-bar push button: Export.
Application Tool / Status Bar Calls
This function is called by clicking the Application tool-bar push button: Export or the Report viewer tool-bar push button: Export.
Mandatory Prerequisites
There are no Mandatory Prerequisites related to Exporting Reports.
Screenshot and Field Descriptions
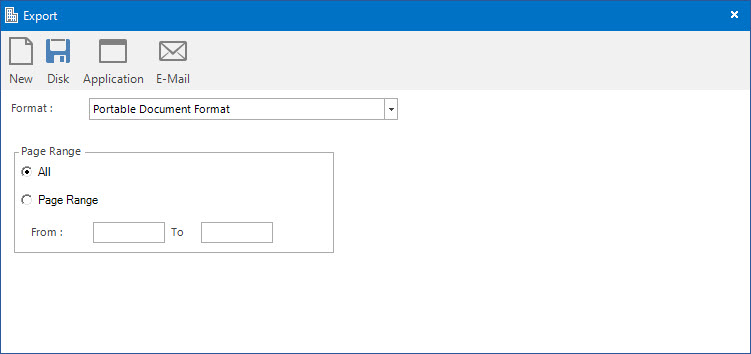
Format: this is the drop down list of formats to export the report to, eg. PDF, Excel, Rich Text, etc. Based on the option selected, various fields will be shown or hidden.
How Do I : Export a Report to another file format
- At the Format drop down list, select the required format.
- Fill out the various option fields shown as required.
- Click the Application tool-bar push button: Disk to export and save the Report in the new file format. Or click the Application tool-bar push button: Application to export and open the Report in the application associated with the new file format.
How Do I : E-Mail a Report
- A Report can be exported and e-mailed to Contacts as an attachment.
- At the Format drop down list, select the required format.
- Fill out the various option fields shown as required.
- Click the Application tool-bar push button: E-Mail.
- The E-Mail application is displayed with the Report exported to the new file format and attached to the E-Mail template.
- Refer to Sending E-Mails for field descriptions and how to send the e-mail.
How Do I : Export a Report to Microsoft Excel
Reports are generally designed for printing, therefore don't always export to Excel in a usable format.
There are many options to select with exporting a Report to Excel. Some work better than others depending on how the report is structured. Try the following as a starting point:
- At the Format drop down list, select the Excel (Data Only) option.
- Select the Custom option in the Excel Format group.
- Select the Page Header option in the Column widths based on objects in the: drop down list.
Alternative options that might work better:
- Click the Constant column width (in points): option then enter the value 2000 next to it. This will extend the column width to 2000 points which will generally force the data into the correct columns.
- Click the Maintain relative object position check box. This will force each column to maintain its relative position to the actual printed version of the report.
Related Topics
Exporting Reports is associated with the following topics: